Webview Template Feature
Background
Suppose you have a Mobile Web Application (H5), and you wish to transition it to a Binance mini program, necessitating a complete code rewrite. To accelerate developers' journey in mini program creation, we have constructed an H5 mini program template. This template enables you to develop a mini program from your own webpage, negating the need for any code alterations.
Quick Start
Your first steps should entail creating an application on the Mini Program Management Platform. Next, navigate to the application detail page, select the upload button, and pick Use a template.

Enter the version, H5 Application Link, and a description. Click submit to finish.
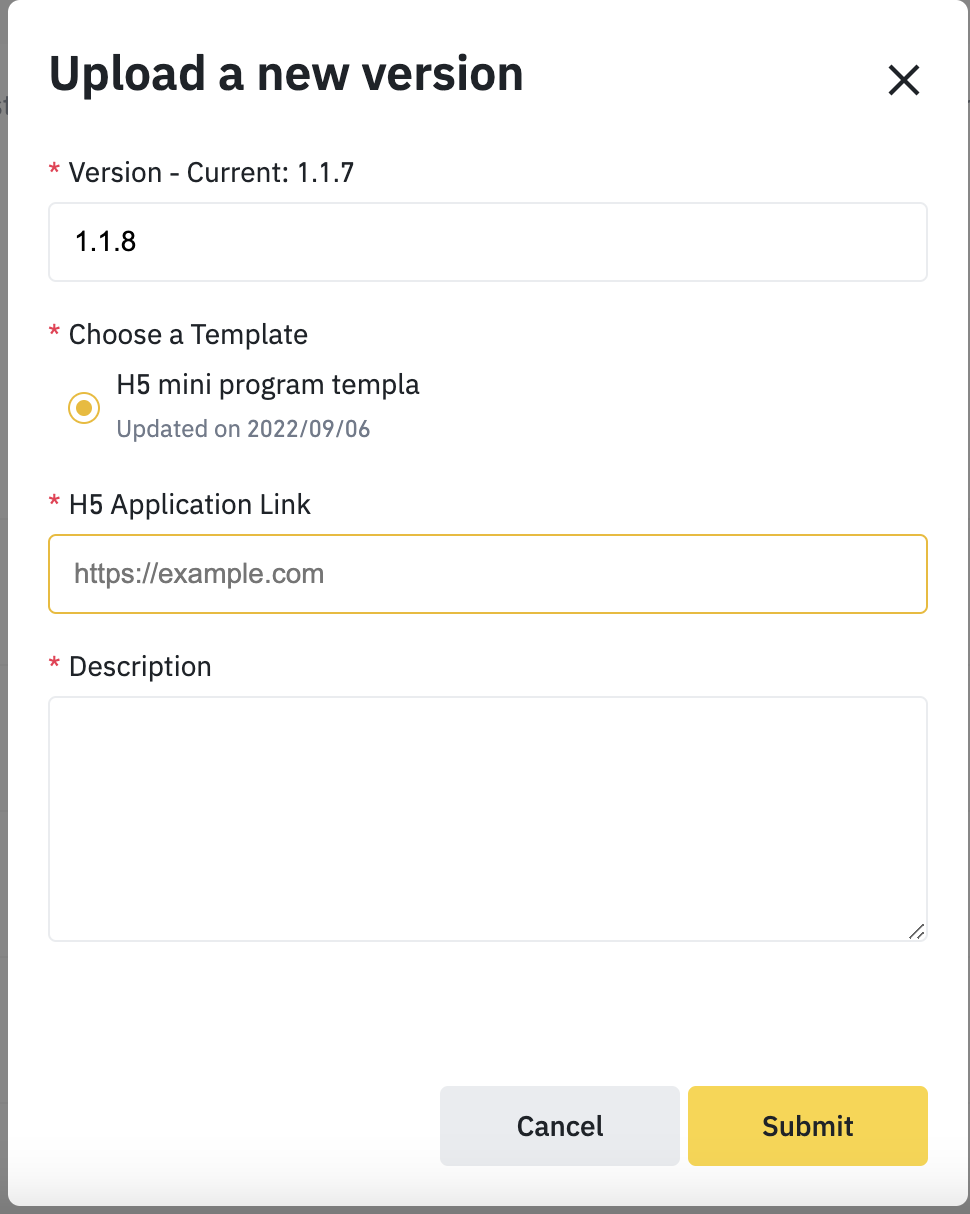
That's it! After Mini Program Auditor approval, your application is ready for publishing. Remember, if you've not done it before, you may need to add the web view host to the white list.

Confused about the Mini Program Management Platform? Refer to the Management Portal document for more details.
When your code is executing on the web page, you can still call the mini program API. This, however, necessitates SDK file importing to your page first.
<script
src="https://public.bnbstatic.com/static/js/mp-webview-sdk/webview-v1.0.1.min
.js"></script>
Note: To ensure a consistent and controlled speed experience for users, it's recommended for developers to position the SDK file on their own CDN.
<script>
  // PostMessage from web page to mini-program
function requestPayment({ payload }) { if (window.__NEZHA_BRIDGE__) {
      // it's inside the mini program webview
bn.miniProgram.postMessage({ action: 'requestPayment', payload }) } else {
      // do the payment for the desktop web
} }

// Receive messages from mini-program.
bn.onMessage = function ({data}) {

console.log(data) // { action: 'requestPayment', payload: { status: '0'} }
}
</script>
A global object, bn, is injected by the SDK. Using the postMassage method to send request and using onMessage to handle the callback of response. The parameter action is the API name and the parameter payload is the API options. Both request and response maintain the same format.
Interface Message {
  action: string
  payload: any
}
Consult the mini program API documentation to identify which API is suitable for use.
How to Integrate Binance Pay On Webview Feature

Integrating with Binance Pay
Take a look at the document of Binance Pay for guidelines on a back-end server integration to generate an order.
The Create Order API will return your server with the parameter prepayId. A sample response looks like this:
{
  "status": "SUCCESS",
  "code": "000000",
  "data": {
    "prepayId": "29383937493038367292",
    "terminalType": "APP",
    "expireTime": 121123232223,
    "qrcodeLink": "https://qrservice.dev.com/en/qr/dplkb005181944f84b84aba2430e1177012b.jpg",
    "qrContent": "https://qrservice.dev.com/en/qr/dplk12121112b",
    "checkoutUrl": "https://pay.binance.com/checkout/dplk12121112b",
    "deeplink": "bnc://app.binance.com/payment/secpay/xxxxxx",
    "universalUrl": "https://app.binance.com/payment/secpay?_dp=xxx=&linkToken=xxx"
  },
  "errorMessage": ""
}
Calculate the payment signature for mini program
The backend will require a signature calculation for the mini program, using the prepareId from the previous step, adhering to the same rules for order creation.
Example:
String payload = "certSn=317c110ebf7baf641e8f49ab6851331737dbe98541947c53b9dbba27f8c8414f" + "&" + "merchantId=98765987" + "&" + "noncestr=5K8264ILTKCH16CQ2502SI8ZNMTM67VS" + "&" + "prepayId=98765987" + "&"+ "timeStamp=1618302830073"; String signature = hex(hmac("sha512", payload, secretKey)).toUpperCase();
A sample code in node js will be like:
import { createHmac } from 'crypto'

export function sign(payload: string, apiKeySecret: string) {
  return createHmac('sha512', apiKeySecret)
    .update(payload)
    .digest('hex')
    .toUpperCase()
}

export function signPaymentOption(option: PaymentOptions, apiKeySecret: string): PaymentOptionsWithSign {
  const { certSn, merchantId, noncestr, prepayId, timeStamp } = option
  const signature = sign(
    certSn=${certSn}&merchantId=${merchantId}&noncestr=${noncestr}&prepayId=${prepayId}&timeStamp=${timeStamp},
    apiKeySecret,
  )
  return { ...option, paySign: signature }
}
Return everything to your mini program app
Evoke the payment process from mini program
Once you have all the steps in place, evoke the payment process from the mini program by calling the API requestPayment({}).
const { certSn, merchantId, timeStamp, nonceStr, paySign } = resp // from step 2

const payload = {
    certSn,
    merchantId,
    timeStamp,
    nonceStr: resp.noncestr,
    package: `prepay_id=${resp.prepayId}`,
    paySign: paySign,
  }

function requestPayment({ payload }) {
    if (window.__NEZHA_BRIDGE__) {
      // it's inside the mini program webview

      bn.miniProgram.postMessage({ action: 'requestPayment', payload })
    } else {
      // do the payment for the desktop web
    }
  }

bn.onMessage = function ({data}) {
    console.log(data) // { action: 'requestPayment', payload: { status:  '0'} }
 if(data.action === 'requestPayment') {
      if(data.payload.status === ‘0’){
       // success, be notice, it's a string '0'
     }
  }
}
Note:
- The API
requestPaymentneeds special permissions. Please check with Binance Support whether your mini program appid holds the necessary permissions. - The timeStamp to
requestPaymentis a string.
Debug on Real Devices
For debugging on real devices, you need to create an experience QR code. When the QR code is scanned, you can view the logs on the real devices.
Refer to Mini Program Experience Version
